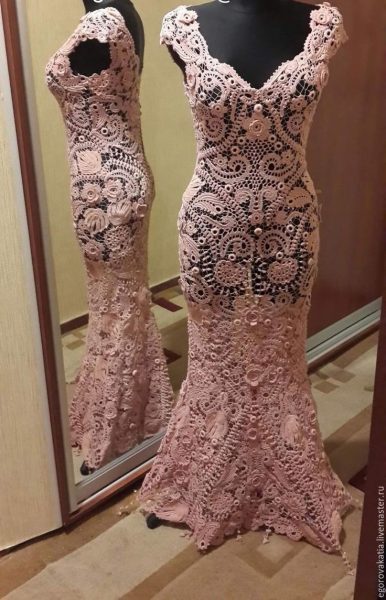
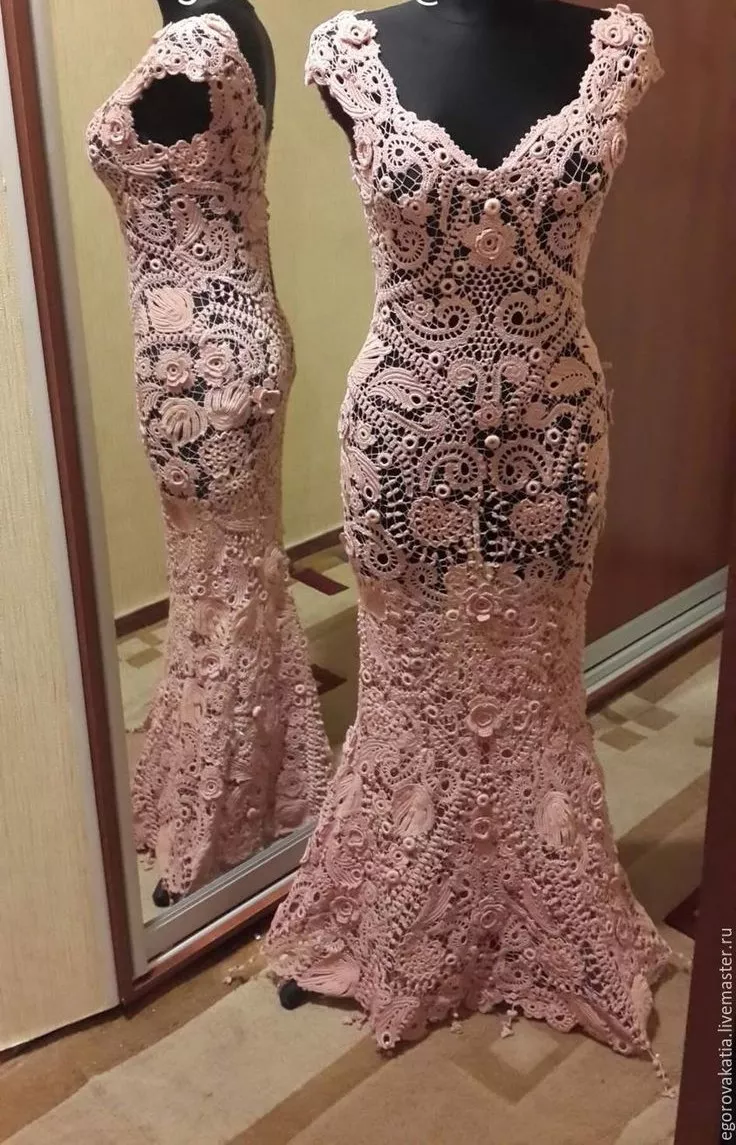
Pink Wedding Dress: A Unique and Romantic Crochet Pattern
A pink wedding dress is an eye-catching and beautiful alternative to the traditional white gown, offering a unique and personal touch for your special day. This crochet pattern for a pink wedding dress combines elegance, femininity, and timeless beauty. Perfect for brides who want to express their personality while still embracing the romance of a wedding dress, the pink wedding dress can be customized to suit your style and the theme of your celebration.
Materials You’ll Need
Before beginning the pink wedding dress, make sure to gather these essential materials:
- Yarn: Choose a high-quality, soft yarn that drapes well, such as cotton, silk, bamboo, or a yarn blend that contains these fibers. For a wedding dress, a yarn with a subtle sheen, such as a silk-cotton blend or bamboo, will add a touch of luxury. The color should be a soft pink or a deeper, blush pink for a romantic look. You will need approximately 1,500–2,500 yards, depending on the size of the dress and the length.
- Crochet Hook: A size H (5mm) or I (5.5mm) hook is recommended. Adjust the hook size according to your tension and the thickness of the yarn.
- Measuring Tape: To take accurate measurements and ensure a good fit.
- Scissors: For cutting the yarn.
- Tapestry Needle: To weave in ends and sew pieces together.
- Stitch Markers: For keeping track of pattern repeats and shaping.
- Buttons or Beads (Optional): To add decorative accents.
Step-by-Step Pattern Instructions
1. Taking Your Measurements
Accurate measurements are crucial for a well-fitting dress:
- Bust: Measure around the fullest part of your bust.
- Waist: Measure around your natural waistline.
- Hip: Measure around the fullest part of your hips.
- Length: Measure from the top of your shoulder to your desired dress length, including any train if applicable.
2. Crocheting the Bodice
- Foundation Chain: Create a foundation chain that matches your bust measurement, plus 2–3 extra stitches for comfort.
- First Row: Work a row of double crochet (DC) or half-double crochet (HDC) stitches as the base of your bodice. Turn your work at the end of each row and chain 1 (for HDC) or chain 2 (for DC) to start the next row.
- Shaping the Bodice: Use increases and decreases to shape the bodice, ensuring it fits snugly around the bust and waist. Front post and back post double crochets can add texture and support.
- Details: Add lace, shell patterns, or puff stitches to create a more elaborate look. You can also include openwork sections for a touch of elegance.
3. Creating the Skirt
- Joining the Skirt to the Bodice: Once the bodice is complete, join the skirt by working from the bottom of the bodice down.
- Increasing for Fullness: Gradually increase the number of stitches in each round to create a flared effect. To create volume, add 2 DC in the same stitch at regular intervals.
- Length of the Skirt: Continue crocheting until the skirt reaches the desired length. You can make a floor-length gown, a tea-length dress, or even an ankle-length dress, depending on your preference.
- Layering Options: For a more dramatic effect, consider adding a sheer lace or tulle overlay to the skirt or crochet a second, separate layer with a lighter, airy pattern.
4. Adding the Train (Optional)
- Extending the Skirt: To add a train, simply continue crocheting in rounds or rows, gradually increasing the stitches to create the desired length and fullness.
- Decorative Edges: Finish the train with lace trim, scalloped edges, or picot stitches for added elegance.
5. Creating Sleeves (Optional)
- Sleeve Base: To make sleeves, create a chain that matches your armhole measurement and join to form a ring.
- Crocheting the Sleeves: Work in the round or back and forth to create sleeves. You can create long, fitted sleeves or short, puffed sleeves depending on the desired look.
- Finishing Touches: Add decorative elements to the sleeves such as lace edges, ruffles, or beaded details.
6. Embellishing the Dress
- Halo or Collar: Create a decorative halo or collar by crocheting a chain to fit around the neckline and adding shell or lace motifs.
- Adding Beads or Sequins: To give the dress a touch of sparkle, sew beads or sequins into the bodice, skirt, or sleeves.
- Button Closures: If your dress design includes button closures, sew buttons securely to the back or front as needed.
7. Finishing Touches
- Weaving in Ends: Use a tapestry needle to weave in loose ends, making sure they are hidden within the seams.
- Blocking: Lay the dress flat on a blocking mat, pin it into shape, and allow it to dry completely. This step helps the dress hold its shape, smooths out any uneven areas, and ensures a professional finish.
Customization Tips
- Color Choices: Experiment with different shades of pink, from soft blush to deeper rose, to find the perfect shade for your wedding theme.
- Stitch Variations: Mix different crochet stitches such as shells, picots, and puff stitches to add texture and visual interest.
- Embellishments: Add pearl trim, lace appliqués, or embroidered flowers to make your dress unique.
Conclusion
The pink wedding dress is a bold, beautiful, and romantic choice that sets you apart from traditional bridal wear. By following this detailed crochet pattern and adding your own personal touches, you can create a dress that reflects your style and adds a touch of charm to your special day. Take your time with each step and enjoy the process of creating something unique and memorable. Happy crocheting!

Compartilhe com os amigos

