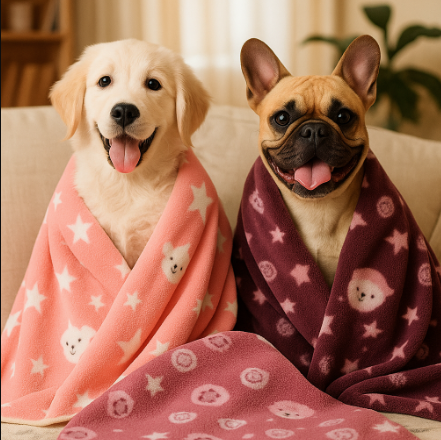
A well-made quilt makes your dog’s bed comfortable, warm, and lovingly crafted. Below you’ll find a complete step-by-step guide—from materials to final stitching—designed for those with a basic sewing machine and looking for a secure, durable finish. I’ll present patchwork options (blocks) and continuous panels, as well as finishing and care tips.
Materials Needed
Fabrics: Choose soft, durable fabrics (cotton, flannel, corduroy, or plush). For the top: 3-4 prints or a single panel. For the lining: soft fabric (knit, flannel, or fleece).
Batting: Medium-thick acrylic batting (polyester) or cotton batting.
Heavy-duty sewing thread (polyester).
Fabric scissors, circular cutter, and patchwork ruler (optional).
Sewing machine with a universal needle or a needle for thicker fabrics.
Pins, clothespins, or patchwork clips.
Iron and ironing board.
Ready-made bias tape or strips for binding.
Optional: non-slip fabric for the base or temporary adhesive spray to suffice.
Measurements (choose according to the dog’s size)
These measurements are final suggestions (finished quilt size). Use the one that best fits:
Small: 40 cm x 50 cm.
Medium: 60 cm x 80 cm.
Large: 80 cm x 110 cm.
If using patchwork with finished 10 cm blocks: cut 12 cm x 12 cm squares (with a 1 cm seam allowance on each side), which will result in finished 10 cm blocks. Examples of block quantities (finished 10 cm): small 4 x 5 = 20 blocks; medium 6 x 8 = 48 blocks; large 8 x 11 = 88 blocks.
Click and download the free pattern
Step 1 — Prepare the Fabrics
Wash and dry all fabrics before cutting: fabrics shrink and will lose color. This prevents the quilt from becoming crooked later.
Iron each piece to remove wrinkles and make cutting easier.
For patchwork: Mark and cut squares using a ruler and cutter. For a continuous panel: Cut the top to the quilt’s dimensions, adding a 2 cm margin on each side (e.g., for a 60 x 80 cm square, cut 64 x 84 cm).
Step 2 — Assembling the Top (Patchwork)
Arrange the squares in a grid on a flat surface until you find a balance of colors/patterns.
Sew the squares together in rows: Place two squares right sides together, aligning the edges; sew with a 1 cm margin; continue until the row is complete.
Join the rows: Place two rows right sides together and sew along the edge, aligning the meeting points. Press the seams to the desired side (open or to one side) with an iron.
Repeat until you have the complete top to the desired measurements. If you choose a continuous panel, skip this step.
Step 3 — Prepare the “sandwich” (top + batting + lining)
Lay the lining right side down on a large, clean surface.
Place the batting on top, centering it.
Place the top (right side up) on top of the batting. Make sure all layers are aligned and leave a 1–2 cm overhang at the edges for finishing.
Secure with pins, paper clips, or use temporary adhesive spray to prevent the layers from slipping.
Step 4 — Quilting (Stitching the Batting)
Simple quilting: Sew straight, parallel lines every 5–7 cm, crossing all three layers. Use a regular presser foot or a walking foot if available. This keeps the batting in place.
Another option is to sew along the patchwork lines (seams where the squares meet), which creates a beautiful visual effect and secures the stuffing.
If you prefer a more handcrafted look, tuft stitches with thick thread and a long needle—but be careful not to leave loose knots that the dog could pull.
Step 5 — Trim and Bind
Cut the edges to make them straight and to the desired final measurements.
For a professional finish, apply bias tape: cut 6 cm wide strips, join them to form a long strip (join diagonals), fold in half, and turn inside out. Insert the bias tape starting from one side, sew along the face of the bias with a 1 cm seam allowance, fold to the opposite edge, and sew with a blind stitch or sewing machine.
Click and download the free pattern
A simpler alternative: fold 1 cm of the seam allowance inward twice and sew close to the edge for a “gathered” finish.
Step 6 — Safety and Personalization Details
Avoid buttons, beads, or small elements that the dog could tear off and swallow.
For extra strength, double-stitch the edges.
If you want a non-slip quilt, sew a non-slip fabric underlay or apply small dots of non-slip silicone to the outer edges.
For a removable cover, add a zipper strip to the top before assembling the “sandwich” so the filling can be removed and the cover washed separately.
Finishing and Final Care
Check all seams and trims. Reinforce exposed corners and seams.
Hand wash or wash on a delicate cycle with mild detergent on the first wash to test colors/shrinkage. Dry in the shade or in a dryer on low heat, depending on the fabric.
Recommended care: Wash every 2–4 weeks, depending on use; brush with a special brush before washing to remove excess hair.
Quick Tips and Common Problems
If the top pulls when sewing, try sewing shorter lines and using a presser foot to reduce shifting.
For rounded edges, trace a corner with a small plate and cut it; make the bias binding in curved strips.
If the batting shifts after several washes, increase the frequency of quilting (sew closer together).


