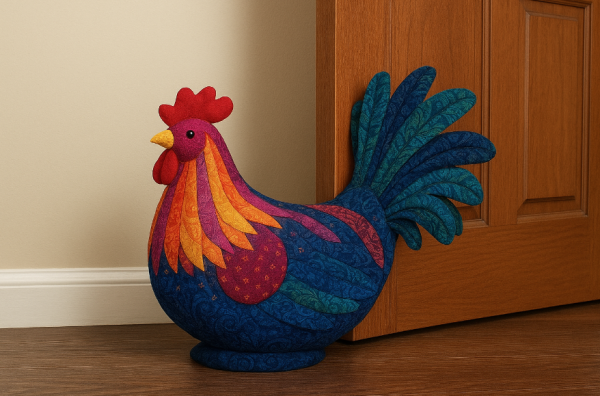
Chicken or rooster-shaped doorstops are a classic craft decor item, bringing charm and functionality to any home. Besides being decorative, they prevent doors from slamming in the wind. If you enjoy sewing and want to get your hands dirty, here’s a simple and creative guide to making your own Fabric Chicken Doorstop.
Materials Needed:
Printed fabric (colorful for the body, wings, and tail)
Felt (for the crest, beak, and wattles)
Colorful sewing thread
Needle or sewing machine
Scissors
Pins
Acrylic stuffing (feathering)
Sand, pebbles, or rice (for weight)
Printed chicken patterns (you can also draw by hand)
Button or bead for the eyes
Step by Step:
1. Cut the Patterns:
Draw or print patterns for the chicken’s body, wings, tail, and head. Cut the fabric according to the pattern, remembering to cut in pairs for the front and back.
2. Assemble the Body:
Sew the two body parts together, leaving an opening at the bottom. Set aside.
3. Make the Head and Details:
Cut out the crest, beak, and wattles from felt. Place the piece between the two head pieces and sew, leaving an opening to turn and stuff.
4. Add Stuffing and Weight:
Fill the chicken’s body halfway with down. Then add a small bag of sand, rice, or pebbles for added weight. Top off with more stuffing and close the opening with invisible stitches.
5. Assemble the Wings and Tail:
Sew the pieces together, turn inside out, and stuff lightly to add volume. Secure them to the chicken’s body with firm stitches.
6. Add the Eyes:
Sew on black buttons or beads for the eyes.
7. Finish with Creative Details:
Use colorful fabrics to create a cheerful and vibrant chicken. You can mix floral, geometric, and solid prints for an even more charming handmade effect.
Result:
You will have a beautiful Fabric Chicken Doorstop, useful and decorative, perfect for brightening up your home or even selling as a craft.
👉 Extra tip: create themed versions (Christmas chicken, June chicken, colorful chicken, or minimalist chicken) and transform your craft into a unique piece!


