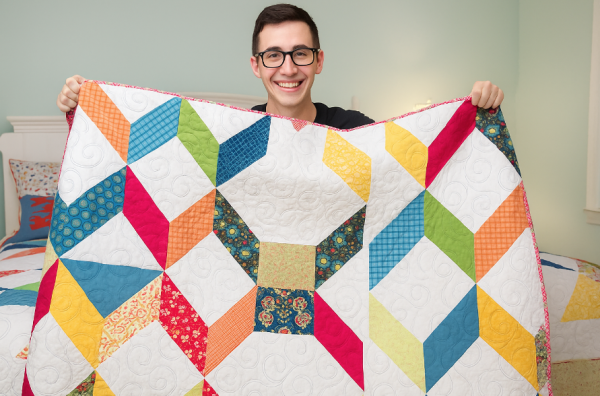
Creating a handmade quilt is more than just sewing fabric pieces together: it’s about bringing to life a project full of colors, creativity, and coziness. The quilt you saw in the image is a vibrant geometric patchwork, with diamond-shaped blocks that form a star effect and add movement to the piece.
If you’re a beginner, don’t worry — this guide will teach you step by step, from the basic materials to more advanced finishing techniques. In the end, you’ll have not only a beautiful quilt but also the pride of having created something unique with your own hands.
Necessary Materials
Fabrics
-
100% cotton fabrics (poplin is the most common in patchwork);
-
Various contrasting colors and prints (such as blue, green, yellow, red, orange, and small floral prints);
-
White or neutral fabric for the background, highlighting the colors;
-
Fabric for the backing (solid or with a soft print);
-
Fabric for the binding (edge finishing).
Batting (filling)
-
Acrylic or cotton batting with the thickness of your choice (the thicker, the fluffier the quilt).
Tools
-
Sewing machine (preferably with straight stitch and quilting option);
-
Patchwork ruler (clear acrylic with angle markings);
-
Rotary cutter and cutting mat;
-
Fabric scissors;
-
Pins or patchwork clips;
-
100% cotton thread (neutral or colored, depending on the project);
-
Iron (essential for setting seams).
Click and download the free pattern
Step 1 – Planning and Choosing Colors
The beauty of this quilt lies in the contrast between the colorful blocks and the white background. To create harmony:
-
Choose at least 6 different colors of solid and printed fabrics.
-
Mix vibrant tones (such as yellow, red, and blue) with small prints for variety.
-
Use white or light beige as a neutral base to enhance the colors.
Tip: Lay out the blocks on paper first or use patchwork software/apps to preview the combination before cutting.
Step 2 – Cutting the Blocks
The quilt’s pattern is made of diamonds that come together into stars.
-
Cut 12 x 12 cm fabric squares.
-
Cut them diagonally to form triangles.
-
Join two triangles to create a diamond.
-
Mix different colors for each diamond.
-
For the center of each star, use a bold printed square to create a focal point.
Step 3 – Assembling the Blocks
-
Arrange four differently colored diamonds to form a star.
-
Place a white square between them to highlight the shape.
-
Sew the diamonds to the background squares, always pressing with the iron after each seam.
-
Join blocks until you form a large quilt top — the final size depends on how many blocks you make.
Tip: Keep seam allowances at 0.75 cm (standard for patchwork) and always press seams flat to avoid bulk.
Step 4 – Assembling the Quilt
Once all blocks are joined:
-
Make the quilt sandwich:
-
Backing (large fabric piece, right side facing down);
-
Batting in the middle;
-
Quilt top (assembled blocks, right side facing up).
-
-
Secure all layers with curved safety pins or special quilting clips.
Step 5 – Quilting
Quilting is the stitching that joins all layers together. It can be simple or creative:
-
Simple: Straight-line stitching along the block seams.
-
Advanced: Free-motion quilting with curves, spirals, and waves (like the quilt in the image).
If you’re a beginner, start with straight lines. Over time, try free-motion designs.
Step 6 – Binding the Edges
-
Cut fabric strips 6 cm wide.
-
Join strips until they’re long enough to go all around the quilt.
-
Fold in half lengthwise, press with the iron, and pin to the quilt edges.
-
Sew to the front, fold to the back, and finish with invisible hand stitches (or a straight stitch by machine).
Advanced Tips
-
Visual harmony: Use a color wheel to combine fabrics. Complementary colors (like blue and orange) create strong contrast.
-
Creative quilting: Practice on fabric scraps before quilting the full quilt.
-
Sizing: This model can be adapted for twin, queen, or even sofa throws.
-
Personalization: Embroider names, dates, or phrases at the bottom to make it truly special.
Estimated Time
-
Cutting fabrics: 2–3 hours
-
Assembling blocks: 4–6 hours
-
Making the sandwich: 1 hour
-
Quilting: 4–8 hours (depending on technique)
-
Binding: 2 hours
In other words, in just two or three days of dedication, you’ll have a finished quilt!
Conclusion
Making a patchwork quilt like the one in the image is a heartwarming project. You begin with simple scraps and, by joining each piece, you create a unique work of art.
From the basics — cutting and sewing blocks — to advanced techniques — free-motion quilting and careful finishing — each step is an opportunity to learn and express yourself.
Beyond decorating your home with more color and comfort, this quilt can become a meaningful handmade gift.
So, choose your favorite fabrics, prepare your sewing machine, and get started!


