
How to Make a Fabric Christmas Tree: Step-by-Step Tutorial

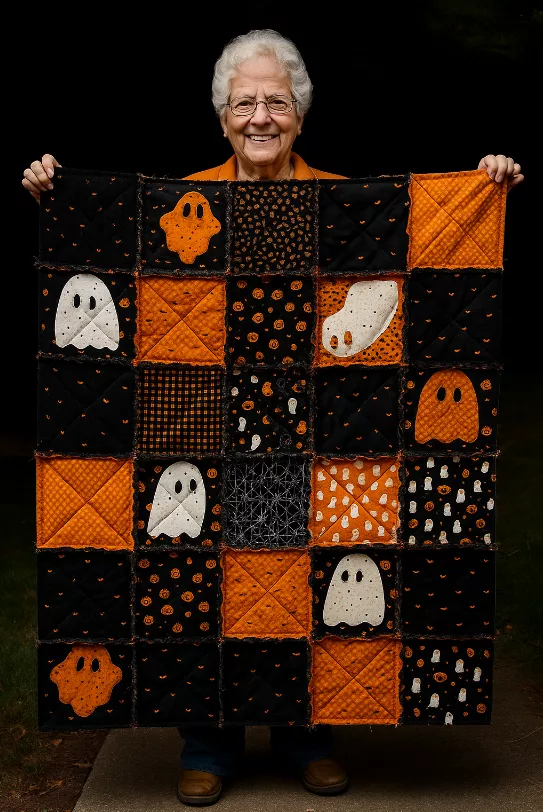
Creating a Halloween-themed quilt is a fun and welcoming way to decorate your home for Halloween. Besides being a charming craft, it can be made at home with simple materials and a touch of creativity. Below, you’ll learn step-by-step how to assemble your themed quilt with classic Halloween colors and symbols.
Materials Needed

See also other free patterns here ➡ 📲🧵🧶
Before you begin, gather all the materials you’ll need:
Cotton fabrics in black, orange, white, and purple (preferably with pumpkins, ghosts, bats, and spiderwebs).
Fabric scissors or a circular cutter.
Ruler and tailor’s pencil to mark the cuts.
Acrylic batting (for stuffing).
Lining fabric (can be a solid color, such as black).
Pins to secure the layers.
Black and orange sewing thread.
Sewing machine (or a needle for hand sewing, if preferred).
Measuring tape.
Iron to smooth the fabrics.
Step-by-Step Quilt Assembly
See also other free patterns here ➡ 📲🧵🧶
1. Cut the fabrics:
Cut the fabrics into approximately 25x25cm squares. Mix prints and colors to create a cheerful and balanced look.
2. Arrange the layout:
Lay out the squares on the floor or on a table, alternating colors and prints (black next to orange, white next to purple, and so on). When you’re satisfied with the arrangement, pin each piece together.
3. Sew the squares together:
Sew the squares together side by side to form horizontal strips. Then, sew the strips together to create the quilt top.
4. Assemble the layers:
Lay the backing, acrylic batting, and quilt top together in that order. Pin them in place to keep them in place.
5. Finish:
Sew the edges and, if desired, sew an “X” through each square to secure the layers and add a handmade touch.
6. Finishing touch:
Iron the quilt to flatten it. If you prefer a more rustic look, wash it after finishing—this will leave the seams slightly frayed and fluffy.
