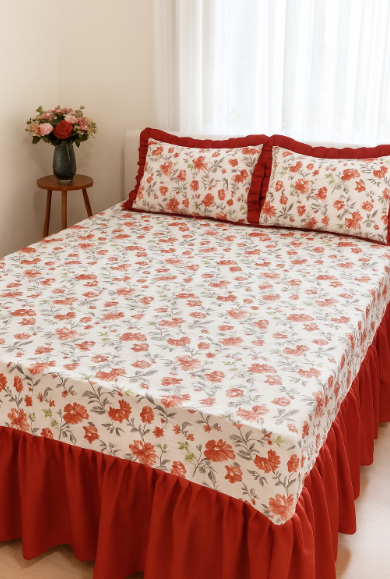
Making your own bedspread is a great way to turn the bedroom into a cozy space full of personality. The bedspread in the image combines a delicate red-toned floral print with a solid ruffle that brings charm and elegance to the room. In this article, we’ll teach you how to make a piece just like it—from choosing materials, through cutting, sewing, and finishing, to making the matching pillowcases.
If you’ve never sewn a bedspread before, don’t worry—this step-by-step guide is ideal for beginners. With patience and attention to detail, you’ll be able to create something beautiful and functional for your home.
-
Choosing Materials
Before you start, it’s important to choose your materials well, as they directly affect the comfort and durability of the piece.
Fabrics
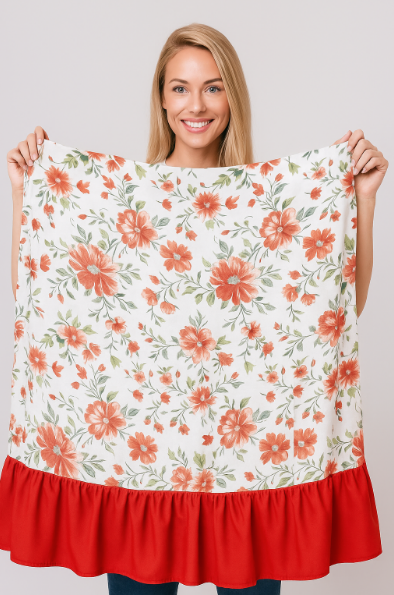
Main fabric (print): for the top of the bedspread and the pillowcases, opt for 100% cotton or 180-thread-count (or higher) percale, as they’re soft and easy to sew.
Ruffle fabric: use a solid cotton or microfiber that coordinates with your chosen print (in this case, red).
Backing: choose a solid fabric, preferably cotton or polyester, for the underside of the bedspread.
Batting
Acrylic batting or R1/R2 batting: gives the bedspread structure and softness. For a lightweight result, use thin acrylic batting (100 g). For a warmer result, use a thicker batting (150 g or 200 g).
Other Materials
High-quality sewing thread in a color that matches the fabric.
Sharp fabric scissors or a rotary cutter.
Measuring tape or ruler.
Pins or sewing clips.
Sewing machine with straight and zigzag stitches.
Iron.
-
Taking Measurements
Before cutting your fabrics, measure the bed correctly.
Mattress width and length: add a 5–10 cm allowance so the bedspread has a nice drape.
Ruffle height: measure from the top of the mattress to the floor and add 5 cm for the hem and seam allowance.
Example for a standard double bed:
Mattress size: 138 cm x 188 cm
Mattress height: 30 cm
Desired overhang: 5 cm extra on each side
Final top piece measurement: 148 cm x 198 cm
Ruffle length: about 240 cm per side + extra for gathering.
-
Cutting the Fabrics
With your measurements noted, make the cuts:
Top (upper panel): cut the printed fabric to the calculated dimensions.
Backing: cut to the same size as the top.
Batting: cut to the same size to create a sandwich between top and backing.
Ruffle: cut strips 50 cm high (or according to your mattress height measurement) and long enough to go around the entire bed. Tip: join strips to reach the total length needed.
-
Assembling the Bedspread
Step 1 – Making the Sandwich
Layer the bedspread as follows:
Backing right side down.
Batting in the middle.
Printed fabric right side up.
Pin everything smoothly and taut to avoid tucks.
Step 2 – Quilting or Securing the Layers
Choose how to secure the layers:
Straight-line quilting: sew parallel or diagonal lines across the surface.
Free-motion quilting: if you have experience, you can stitch designs like flowers or arabesques.
Simple securing: if you prefer, sew a few lines just to keep the batting in place.
Press well with an iron after this step to make the piece lie flat.
Step 3 – Ruffle
Sew the ruffle strips together until you have one continuous length. Fold up the lower edge, press, and stitch the hem. Next, sew a gathering stitch along the top edge (use the longest stitch length on your machine) and pull the thread until the ruffle matches the perimeter of the bedspread top.
Pin the ruffle around the top piece, right sides together, and sew. Then finish the inside seam with a zigzag stitch or overlock/serger to prevent fraying.
-
Edge Finishing
For a flawless result, apply a binding for the finish, or turn the inner seam allowances to the inside and stitch them down, ensuring everything is neat with no loose threads showing. Press again to set the seams.
-
Making the Pillowcases
Materials
Use the same printed fabric as the bedspread to keep everything coordinated.
Step by Step
Cut two fabric rectangles for each pillowcase, one for the front and one for the back.
For the back, split it into two pieces and make a 3 cm fold on each to create the envelope opening.
Join front and back, sewing the sides and the top edge.
Turn right side out and press.
If you like, add the same red ruffle along the edge to match the look in the image.
-
Final Touches
Press the entire bedspread and pillowcases for a professional finish.
Place them on the bed and adjust the drape.
Pair with a vase of flowers or decorative pillows to add charm to the space.
-
Extra Tips
Washing: prewash fabrics before sewing to avoid shrinkage.
Colors: if you’re making this for a different room, vary the solid fabric color to change the style—for example, a white ruffle for a clean look or green for a more natural vibe.
Personalization: embroider initials on a corner of the bedspread for a unique touch.
Conclusion
Making a bedspread with a ruffle and coordinating pillowcases is a rewarding project that completely transforms the look of the bedroom. With the right materials, planning, and patience, you can create a one-of-a-kind piece tailored to your space. Besides saving money, you’ll have the satisfaction of using something you made yourself.