How to Crochet a Baby Blanket: A Step-by-Step Guide for Beginners
Crocheting a baby blanket is a wonderful project for beginners and experienced crocheters alike. A handmade blanket is not only practical but also a thoughtful gift that will be cherished. In this guide, we’ll walk you through the basics of crocheting a simple, beautiful baby blanket. By the end of this article, you’ll have a blanket ready to keep a little one cozy and warm!
Materials Needed
Before you start, gather the following materials:
- Yarn: For a baby blanket, you want a soft and gentle yarn. Baby yarns are typically made from acrylic, cotton, or a cotton-blend, as these fibers are soft, breathable, and easy to care for. Choose a yarn that is machine washable for convenience. A medium-weight yarn (Worsted weight, or Category 4) is a great choice for a blanket.
- Crochet Hook: The size of the hook will depend on your yarn, but for worsted weight yarn, a 5mm (H-8) hook is standard. Check the yarn label for the recommended hook size.
- Scissors: To trim the yarn when you finish.
- Tapestry Needle: For weaving in the loose ends after finishing the blanket.
Basic Stitches Used
To crochet a simple baby blanket, you’ll mostly be using a few basic stitches. Here are the stitches that will likely be used in most baby blanket patterns:
- Chain (ch): The foundation of most crochet projects.
- Slip Stitch (sl st): Used for joining and finishing.
- Single Crochet (sc): A basic stitch that creates a dense fabric.
- Double Crochet (dc): A taller stitch, creating a slightly looser and more airy fabric.
Step-by-Step Instructions for a Simple Baby Blanket
Here’s a basic guide to making a simple crochet baby blanket using single crochet (sc) for a tight, warm fabric, or double crochet (dc) for a looser, more breathable texture. You can adapt the pattern depending on the stitch you prefer.
Step 1: Decide on the Size of the Blanket
A standard baby blanket size is approximately 30 inches by 36 inches, but you can adjust the size to your liking. To make a smaller blanket (e.g., for a stroller or car seat), you could reduce the width to about 24 inches. For a larger blanket (e.g., for a crib), you could aim for around 40 inches by 50 inches.
- For a blanket measuring 30 inches wide, start with a foundation chain of 90-100 chains (this depends on the size of your stitches and your tension).
- For a blanket measuring 36 inches wide, start with a foundation chain of 108-120 chains.
Remember, the number of chains should be a multiple of 2 or 3 if you’re using certain stitch patterns (such as double crochet).
Step 2: Make the Foundation Chain
- Start by making a foundation chain that is the length you want the blanket to be (the width of the blanket will be the length of your foundation chain).
For example, if you’re making a blanket that is 30 inches wide and using worsted weight yarn, chain 90-100 stitches. Keep the chain loose and even. It’s important that your foundation chain is straight to avoid any curling or unevenness.
Step 3: Row 1 – Work Into the Chains
- For Single Crochet (sc) Blanket:
- After your foundation chain, turn your work.
- Insert your hook into the second chain from the hook and work a single crochet.
- Continue making single crochets in each chain across the entire row. When you reach the end of the row, turn your work.
- For Double Crochet (dc) Blanket:
- After your foundation chain, turn your work.
- In the 4th chain from the hook (this will count as your first double crochet), yarn over and pull through to make a double crochet.
- Continue making double crochets across the row. Turn your work at the end of the row.
Step 4: Row 2 and Beyond
For each subsequent row, you will repeat the same number of stitches as in the first row:
- For Single Crochet Blanket:
- Turn your work at the end of each row.
- Chain 1 at the start of the row (this doesn’t count as a stitch).
- Work one single crochet into each stitch across the row. Repeat until the blanket reaches the desired length.
- For Double Crochet Blanket:
- Turn your work at the end of each row.
- Chain 3 at the beginning of each row (this counts as your first double crochet).
- Work one double crochet into each stitch across the row. Repeat until the blanket reaches the desired length.
Step 5: Change Stitches or Add Patterns (Optional)
Once you have the basic pattern down, you can make your blanket more interesting by introducing new stitch patterns. Here are a few options to add texture:
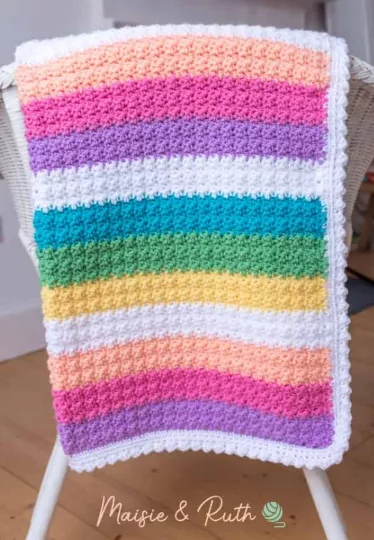
- Granny Stripe: Use different colors and make a “granny stripe” pattern by changing colors every few rows.
- Ripple (Chevron): Create a zigzag effect by alternating increases and decreases across rows.
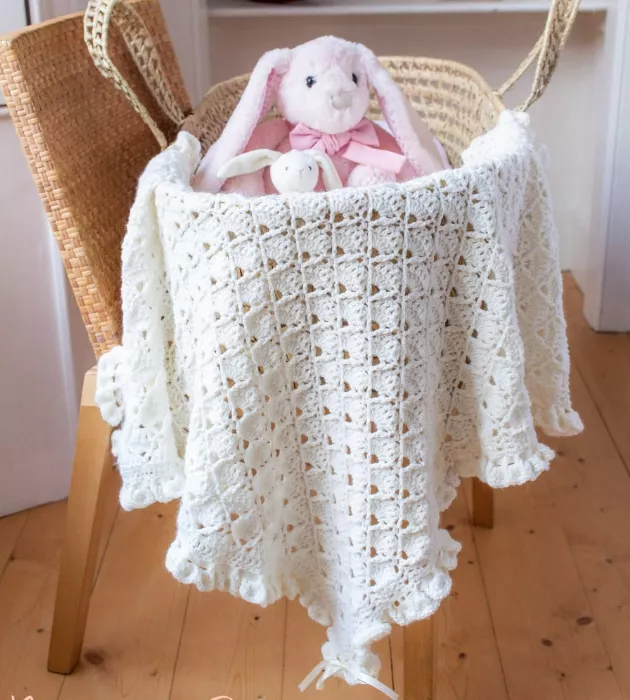
- Shell Stitch: A shell stitch creates a lovely scalloped edge and textured pattern.
If you want to create a textured stitch pattern (like a waffle stitch, herringbone stitch, or cable stitch), follow the specific pattern instructions, but the overall process will remain the same.
Step 6: Add a Border (Optional)
Once you’ve crocheted your blanket to the desired length, you can finish it off with a border to give it a neat, polished look. Here’s how to add a simple border:
- Single Crochet Border:
- Work one round of single crochet (sc) around the entire blanket. You may need to work 2 sc in each corner to help the blanket maintain its shape.
- You can add more rounds for a thicker border (using half double crochet or double crochet), depending on the look you want.
- Shell Border:
- After your single crochet round, you can add a shell border by working 5 dc in each corner and working 1 dc into each stitch along the sides.
- Picot Border:
- For a decorative finish, you can work a picot border by chaining 3 at regular intervals and slip stitching into the first chain of each picot.
Step 7: Finish and Weave in the Ends
- Fasten off your yarn when you reach the end of your last row.
- Use a tapestry needle to weave in any loose ends, making sure they are securely hidden and won’t unravel.
Tips for Crocheting a Baby Blanket
- Use Soft Yarn: Babies have sensitive skin, so be sure to use soft, hypoallergenic yarn that is gentle on their skin.
- Choose a Washable Yarn: Baby blankets tend to get a lot of use, so make sure you select a yarn that’s easy to care for and machine washable.
- Measure Often: Keep track of the size of the blanket as you go to ensure you’re creating the right dimensions.
- Consider Using a Lighter Stitch: For warmer weather, consider using a looser stitch like double crochet or a lighter yarn to create a breathable, soft blanket.
- Add Color or Pattern: Don’t be afraid to experiment with color changes or textured patterns to add some flair to your blanket.
Conclusion
Crocheting a baby blanket is a rewarding project that results in a meaningful, useful gift. Whether you choose a simple stitch pattern like single crochet or double crochet or decide to experiment with other designs, the process is straightforward and enjoyable. With a little patience, you’ll have a beautiful, soft blanket ready to keep a little one cozy!
Happy crocheting!

