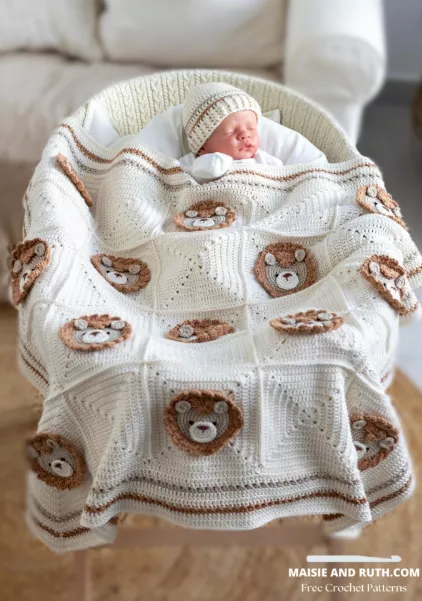
Crochet Waffle Stitch Baby Blanket: A Cozy and Textured DIY Project
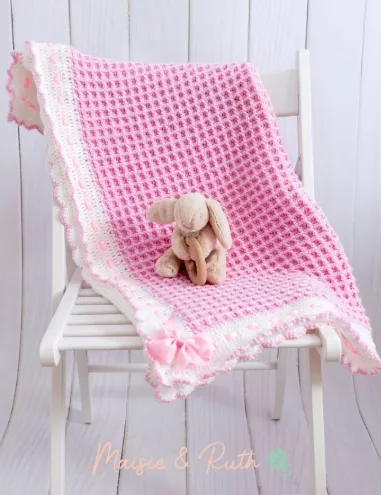
Crocheting a baby blanket is a rewarding and practical project that results in a soft, comforting gift for a newborn. If you’re looking for a pattern that combines texture with simplicity, the waffle stitch is a perfect choice. This stitch creates a beautiful grid-like pattern that resembles the texture of a waffle, making it both visually appealing and thick enough to provide warmth. Whether you’re an experienced crocheter or just starting out, this crochet waffle stitch baby blanket pattern is easy to follow and results in a cozy, timeless gift that any parent will appreciate.
Materials Needed
Before starting, gather the following materials:
- Yarn: A soft, baby-friendly yarn is key. Opt for a yarn that’s gentle on the skin and machine washable. A worsted weight yarn (such as Red Heart Super Saver or Bernat Blanket Yarn) is perfect for a cozy, thick baby blanket. Choose a color that suits the nursery or the season.
- Crochet Hook: Use a 5mm (H-8) hook for worsted weight yarn. Adjust the size of the hook according to the yarn you choose.
- Stitch Markers: Optional, but helpful for marking the beginning of your rows.
- Tapestry Needle: For weaving in any loose ends when the blanket is complete.
- Scissors: For trimming yarn when you’re finished.
Basic Stitches Used
The waffle stitch uses a combination of basic crochet stitches, including:
- Chain (ch): The foundation of many crochet projects.
- Double Crochet (dc): A taller stitch that creates an airy texture.
- Front Post Double Crochet (fpdc): A variation of double crochet that creates texture by working around the post of the stitch.
- Back Post Double Crochet (bpdc): Another variation of double crochet that gives the blanket its “waffle” texture by working around the back post of the stitch.
Pattern Overview
The crochet waffle stitch is worked in a series of front post and back post double crochets that create a 3D texture, while the foundation chain and double crochet stitches provide the overall structure. This blanket is made in rows from side to side, with the pattern repeating in blocks of four rows. The result is a lovely, thick fabric that’s perfect for keeping little ones warm and cozy.
Step-by-Step Instructions
Step 1: Foundation Chain
- Begin by making a foundation chain of a multiple of 3 plus 2. For example, chain 132 if you want a blanket that’s about 36 inches wide. The length can be adjusted to any size depending on your preference (a typical baby blanket might be 30″x36″ or 36″x40″).
- After making the foundation chain, turn your work.
Step 2: Row 1 – Double Crochet
- In the 3rd chain from the hook, work 1 double crochet (dc).
- Continue working 1 dc in each chain across the row until you reach the end. You should have one less stitch than your foundation chain (because of the turning chain). Turn your work at the end of the row.
Step 3: Row 2 – Waffle Stitch Begins
- Set Up: Chain 2 (this counts as the first dc).
- Work a front post double crochet (fpdc) around the post of the stitch directly below the first dc of the previous row. Then work 1 back post double crochet (bpdc) around the post of the next stitch.
- Repeat this sequence (fpdc, bpdc) across the row until you have just 2 stitches left.
- Finish the row with 1 regular dc in the final 2 stitches.
Step 4: Row 3 – Waffle Stitch Continues
- Chain 2 (counts as the first dc).
- Work 1 front post double crochet (fpdc) around the post of the front post double crochet from the row below.
- Work 1 back post double crochet (bpdc) around the post of the back post double crochet from the row below.
- Repeat this alternating pattern across the row until you have 2 stitches left.
- Finish the row with 1 regular dc in the last 2 stitches.
Step 5: Repeat Rows 2 and 3
- Repeat rows 2 and 3 until the blanket reaches the desired length. The waffle stitch pattern creates a textured grid, so you should see the pattern start to emerge after just a few rows. Continue alternating between front post and back post double crochets, and remember to work regular double crochet stitches at the end of each row.
Step 6: Final Row
- For the final row, work 1 double crochet in each stitch across the row (without the waffle stitch texture) to give the blanket a clean edge. This will help the blanket maintain its shape.
- Fasten off the yarn, leaving a tail long enough to weave in the end with a tapestry needle.
Step 7: Weave in Ends
- Use a tapestry needle to weave in any loose ends from the foundation chain or where you’ve fastened off your yarn. Make sure to weave them securely to avoid any unraveling.
Customizing Your Crochet Waffle Stitch Baby Blanket
This simple pattern can be adjusted to suit your personal style or needs:
- Size: The size of the blanket is completely customizable. You can make it a smaller receiving blanket or a larger one for a crib or toddler bed. Adjust the foundation chain and the number of rows accordingly.
- Colors: Experiment with color changes to create stripes or blocks of color. You can switch yarns after a set number of rows or create a gradient effect with different shades.
- Border: Add a simple border around the blanket to finish it off neatly. A single crochet border works well, or you can use a more decorative stitch like picots or shell stitches for a bit of flair.
- Texture Variations: Try incorporating other stitch patterns within the blanket, like shell stitches or cluster stitches, for added texture. Just be sure to maintain the waffle stitch in the main body of the blanket for consistency.
Conclusion
The crochet waffle stitch baby blanket is a beautiful and cozy project that is both easy to make and enjoyable to work on. The textured pattern adds a charming visual element while creating a thick, warm fabric perfect for a newborn. Whether you’re making it for a special baby shower gift or to keep your own little one snug, this blanket will surely be treasured for years to come.
Crochet a waffle stitch baby blanket today, and you’ll be amazed at how quickly you can create something so soft, warm, and beautiful. Happy crocheting!
