Crochet Baby Blanket Pattern: Easy and Cozy
Crocheting a baby blanket is a perfect project for beginners and seasoned crocheters alike. The soft texture, warmth, and versatility of crochet make it an ideal choice for a baby’s first blanket. This pattern uses basic crochet stitches, but the result is a beautiful, cozy blanket that any little one will love.
In this pattern, we’ll use double crochet for a light, airy fabric that’s still warm enough for a baby. The stitch pattern is simple and works up quickly, making it a great option for a beginner who wants to create something functional and special.
Materials Needed:
- Yarn: Choose a soft, baby-friendly yarn. Acrylic or cotton-blend yarns are good choices, as they are easy to wash and gentle on a baby’s skin. For this pattern, we recommend a medium weight (worsted weight) yarn (Category 4).
- Approx. 800-900 yards (depending on the desired size).
- Crochet Hook: Use a 5mm (H-8) crochet hook for worsted weight yarn.
- Tapestry Needle: To weave in the ends.
- Scissors: To trim the yarn when you’re done.
Gauge:
- Gauge: 4″ x 4″ square = 12 double crochet stitches and 7 rows in the pattern.
- If your gauge is smaller, use a larger crochet hook. If your gauge is larger, use a smaller crochet hook.
Size:
This pattern creates a 36″ x 36″ square blanket, which is a typical size for a baby blanket. You can easily adjust the size by changing the number of starting chains and the number of rows.
Step-by-Step Instructions:
Step 1: Foundation Chain
Start with a chain of 120 stitches. This will give you a width of approximately 36 inches, depending on your tension. You can add or subtract stitches to make the blanket wider or narrower. Make sure the number of chains is a multiple of 3 to maintain the stitch pattern.
Tip: If you want a longer blanket, just continue adding chains in multiples of 3.
Step 2: Row 1 – Double Crochet (dc) in Each Chain
- Turn your work.
- In the 4th chain from the hook, make a double crochet (dc).
- Continue working 1 double crochet (dc) in each chain across the row until you reach the end.
- Turn your work at the end of the row.
Now you should have your first row of double crochets, and your blanket will begin to take shape!
Step 3: Row 2 – Begin the Pattern
- Chain 3 (counts as your first double crochet).
- Work 1 double crochet (dc) into the next stitch.
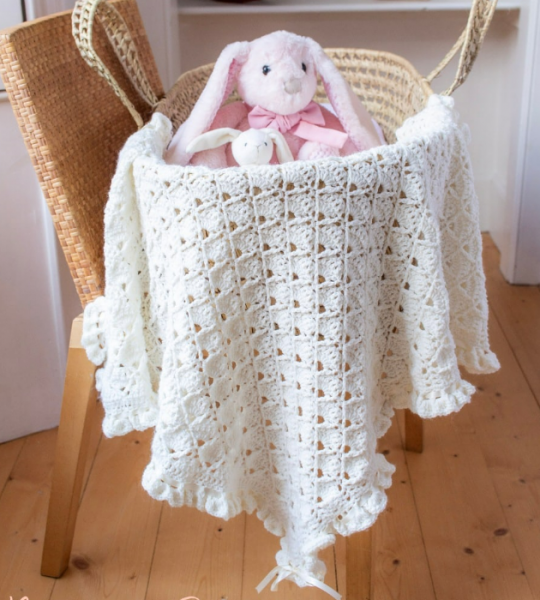
- Skip 2 stitches, and in the 3rd stitch, work 3 double crochets into the same stitch. This forms a shell.
- Skip 2 stitches, and then work a double crochet (dc) into the next stitch.
- Repeat this pattern (skip 2, work 3 double crochets in the next stitch, skip 2, dc in the next) across the row.
- At the end of the row, there should be 2 stitches remaining. Skip the first, and work 1 double crochet (dc) in the last stitch.
- Turn your work.
Step 4: Row 3 and Beyond – Continue the Pattern
- Chain 3 (counts as the first double crochet).
- Work 1 double crochet (dc) in the next stitch.
- Skip 2 stitches, and in the 3rd stitch, work 3 double crochets into the same stitch (this creates the shell).
- Continue this pattern across the row, skipping 2 stitches and making a shell of 3 double crochets into the 3rd stitch.
- At the end of each row, skip 2 stitches and work 1 double crochet (dc) in the last stitch.
- Turn your work at the end of each row.
Repeat this pattern until your blanket is the desired length. Each row will consist of alternating between double crochets and shells, creating a textured, open pattern that looks like stripes.
Step 5: Finish the Blanket
Once your blanket has reached the desired length, it’s time to finish it off.
- For the final row, you can simply work 1 double crochet (dc) in each stitch across the row to even out the edges. This will give the blanket a neat, finished edge.
- Fasten off the yarn and leave a long tail.
- Use a tapestry needle to weave in all loose ends securely.
Optional Border (for added finishing touch)
If you want to add a border to your baby blanket, here’s a simple option to give it a polished, neat look:
- Round 1: Attach your yarn in any corner of the blanket. Chain 1, and work 1 single crochet (sc) into each stitch around the entire blanket. When you reach the corners, work 3 single crochets (sc) into each corner to keep the corners nice and smooth.
- Round 2: For an added touch, you can follow with a round of double crochet (dc) around the entire blanket, working 1 dc into each stitch and 3 dc into each corner space.
- Round 3: You can finish with a picot stitch by chaining 3 and then slip stitching into the first chain at each corner, giving the blanket a delicate, lacy look.
Once you’re happy with the border, fasten off the yarn and weave in any loose ends.
Customizing Your Baby Blanket
This pattern can easily be customized in several ways:
- Size: As mentioned, you can adjust the width and length by adding or removing foundation chains. For a larger blanket, you might want to increase the foundation chain length and continue working the rows until you achieve the desired size.
- Stitch Pattern: The double crochet stitch works well for a baby blanket, but if you want more texture, you can try a shell stitch pattern, granny square, or waffle stitch for a different look.
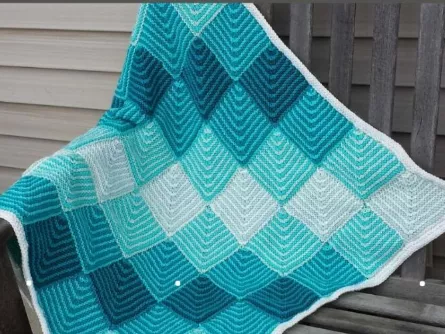
- Colors: You can change yarn colors every few rows for a striped effect, or use a variegated yarn to create a multicolor pattern.
- Border: Customize the border with different stitch patterns like shells, picots, or scallops to add a special touch.
Conclusion
This crochet baby blanket pattern is simple, quick, and full of cozy charm. Using basic stitches like double crochet and shells, you’ll be able to create a soft, textured blanket that will be treasured for years. Whether you’re making it for your own baby or as a thoughtful gift for someone special, this blanket is sure to be loved.
Enjoy the process, and happy crocheting!
FREE PATTERN


