
How to Make a Dinosaur Quilt for Boys and Girls: Complete Step-by-Step Guide

Children love the world of dinosaurs. They spark imagination, bring joy, and create a playful and fun atmosphere in the bedroom. If you want to personalize your child’s space and also learn a useful craft technique, the Dinosaur Quilt Kids Kit for Boys and Girls is the perfect project.
In this article, you’ll learn how to create your own children’s quilt with a dinosaur theme, from choosing materials to the final finishing touches. This guide is detailed and perfect for both experienced sewers and beginners who want to dive into this creative world.
Get ready, because we’re going to explore a step-by-step process full of tips, techniques, and inspiration to transform fabric into comfort and fantasy.
Before we go to the step-by-step, let’s understand the benefits of making this kind of handmade piece:
Personalized décor: nothing better than a unique quilt that matches your child’s personality.
Cozy atmosphere: fabrics and colors create a pleasant and fun environment in the bedroom.
Save money: making the quilt at home can be cheaper than buying a ready-made one at specialty stores.
Love and care: handmade pieces carry affection and meaning, becoming unforgettable keepsakes.
See also other free patterns here ➡ 📲🧵🧶
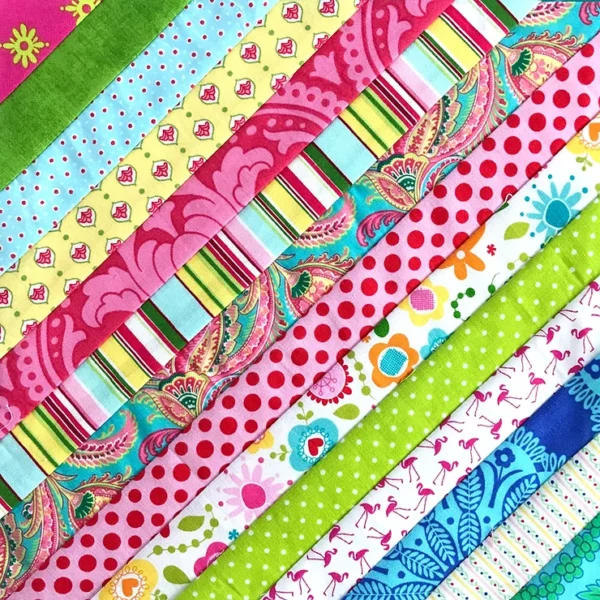
If you, like us, are crazy about quilts, you already know that each one of them has a different
To make the Dinosaur Kids Quilt Kit, you’ll need:
Main fabric (100% cotton or percale): in a mustard yellow tone (similar to the image).
Printed or plain fabric: for the backing.
Colorful fabric scraps (green, orange, blue, white, and black): for the dinosaur, heart, and cloud appliqués.
Acrylic batting R1 or R2 (100g to 200g, depending on desired thickness).
Cotton thread in matching colors.
Fabric scissors and small precision scissors.
Pins and sewing clips.
Sewing machine needles and hand needles.
Fusible web (HeatnBond or similar) for fixing appliqués.
Fabric chalk or marker.
Ruler and measuring tape.
Iron.
The quilt size will depend on the child’s bed. Suggested sizes:
Crib/toddler size: 90 cm x 140 cm (35” x 55”).
Kids bed: 150 cm x 200 cm (59” x 79”).
Single bed: 180 cm x 220 cm (71” x 87”).
Remember to add 2 inches on each side for seam allowances.
The magic of this quilt lies in the appliqué dinosaurs, flowers, hearts, and clouds.
Draw the dinosaur templates on paper (regular paper or cardstock). Choose simple and fun designs (like the ones in the quilt image).
Cut each part separately (body, spikes, eyes, mouth).
Do the same with the flowers, hearts, and clouds.
Tip: if you prefer, print ready-made drawings found online in the right size.
See also other free patterns here ➡ 📲🧵🧶
If you, like us, are crazy about quilts, you already know that each one of them has a different
Place the fusible web on top of the paper template and trace with a pencil.
Cut, leaving a 0.2” margin.
Position the fusible web on the chosen fabric (e.g., orange for the dinosaur body).
Press with a warm iron to fuse.
Cut exactly on the outline.
Repeat for all shapes (dinosaurs, flowers, clouds, hearts).
Lay out the main fabric (yellow) on a flat surface.
Arrange the appliqués (dinosaurs centered, with decorative elements around).
Peel off the fusible web backing and press appliqués onto the fabric with an iron.
Tip: place parchment paper on top to prevent the iron from sticking.
On the sewing machine, use a blanket stitch (small zigzag) or straight stitch close to the edge.
Sew all the way around the designs to secure them after washing.
Use colored threads to highlight the outlines.
This step takes time but is the most fun—it’s where the quilt comes to life.
Now let’s build the classic quilt sandwich:
Lay the backing (fabric) right side down.
Place the batting on top.
Add the quilt top (with appliqués) right side up.
Smooth and pin the layers together.
Quilting is the step that joins the layers and adds design:
For beginners: do straight-line quilting horizontally and vertically, forming squares.
For advanced quilters: try free-motion quilting or wavy lines around the dinosaurs.
This makes the quilt firm and extra charming.
Cut fabric strips (2.5” wide).
Join strips until long enough for the quilt perimeter.
Fold in half lengthwise.
Place binding on the quilt edges, pin, and sew.
Fold to the back and finish with hand sewing (invisible stitch) or machine stitching.
To match the quilt, you can sew a pillowcase:
Cut two fabric rectangles to fit the pillow size.
Appliqué a smaller dinosaur in the center.
Sew the sides with a straight stitch.
Hem the opening.
Now you have the complete set: quilt + pillowcase.
Child’s name: embroider or appliqué the name for a unique piece.
More colors: use variations (green, blue, pink) to suit both boys and girls.
Reversible: use a different fabric on the back to get two quilts in one.
Secret pocket: add a small pocket on the side to store small toys.
Wash on a delicate cycle.
Use mild detergent to preserve colors.
Avoid wringing to protect the batting.
Air-dry in the shade when possible.
The cost will vary depending on fabric quality:
Fabrics (4 yards): $20 to $40.
Batting: $10 to $20.
Thread and extras: $5 to $10.
Average total cost: $35 to $70.
In stores, a themed kids’ quilt can cost up to $150, so making it yourself saves money and can even become a business.
If you enjoyed making this, you can turn it into a business:
Take custom quilt orders.
Offer personalization with names and customer-chosen colors.
Promote on parent groups, Instagram, or marketplaces like Etsy.
Making the Dinosaur Kids Quilt Kit for Boys and Girls is more than just sewing fabric—it’s about creating memories, love, and a joyful atmosphere for children. With the right materials and by following this guide, you’ll craft a unique piece full of personality and warmth.
Whether it’s to decorate your child’s bedroom or to start a new handmade business, this quilt is the perfect mix of creativity, usefulness, and beauty.
Now it’s your turn: choose your favorite fabrics, prepare your sewing machine, and bring the world of dinosaurs to life in the comfort of a kids’ bedroom.