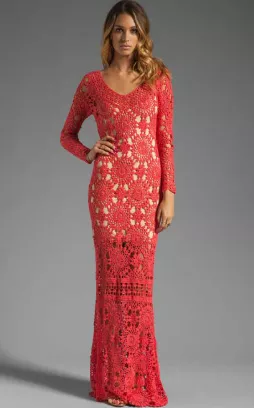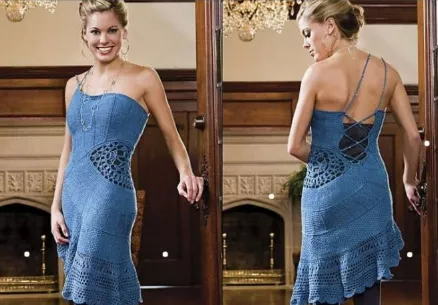
The Ocean Vista Dress is a beautiful and breezy crochet dress pattern, perfect for summer days by the sea or a casual day out. Inspired by the colors and fluidity of the ocean, this dress combines airy lace motifs with a relaxed fit. Here’s a detailed guide to help you crochet your own Ocean Vista Dress.
The bodice of the Ocean Vista Dress uses a combination of basic stitches and lace motifs to create a fitted, flattering top.
Row 1: Ch 3 (counts as first dc), work 1 dc in each chain across the row. Turn.
Row 2: Ch 3 (counts as dc), work 1 dc in each dc across. Turn.
Row 3: Ch 3, work a shell stitch (5 dc) in the next dc. Skip 2 dc, shell stitch (5 dc) in next dc. Repeat across. Turn.
Row 4: Ch 3, work 1 dc in each dc and shell stitch (5 dc) in the spaces from the previous row. Turn.
Repeat Rows 3 and 4 for the desired length of the bodice, typically about 6–8 inches. You want a snug, but comfortable fit here, so adjust the length based on your torso.
Once you’ve finished the bodice, the waist can be shaped by working the next section in a more open lace pattern or slightly increasing stitches to give a loose, airy effect.
Round 1 (Joining in the Round): Ch 3 (counts as first dc), join the ends of your bodice to form a circle using a sl st. Work 1 dc in each stitch around, joining with a sl st to the first dc.
Round 2: Ch 3 (counts as first dc), work 1 dc in each of the next 2 dc, then skip 2 dc, shell stitch (5 dc) in the next dc. Repeat around. Join with a sl st to the first dc.
Round 3: Ch 3 (counts as dc), work 1 dc in the next 3 dc, skip 2 dc, shell stitch (5 dc) in the next dc. Repeat around. Join with a sl st.
You can repeat this pattern to shape the waist, adding more open lace as you go. Continue working in the round until you reach the desired waist width.
The skirt of the Ocean Vista Dress features a flowing, open stitch pattern, giving it an elegant, airy look.
Round 1: Ch 3 (counts as dc), work 1 dc in each dc around. Join with a sl st.
Round 2: Ch 3 (counts as dc), skip 2 dc, shell stitch (5 dc) in the next dc. Repeat around. Join with a sl st.
Round 3: Ch 3 (counts as dc), work 1 dc in the next 4 dc, skip 2 dc, shell stitch (5 dc) in the next dc. Repeat around. Join with a sl st.
Round 4: Ch 3, work 1 dc in the next 5 dc, skip 2 dc, shell stitch (5 dc) in the next dc. Repeat around. Join with a sl st.
Continue adding rounds until the skirt is the desired length. If you want a fuller skirt, you can add more stitches between the shell stitches.
Once the skirt reaches your desired length, you can add a simple, elegant edging.
Bottom Edge: For a scalloped edge, work the following around the bottom of the skirt:
Top Edge (Neckline): You can add a simple finishing edge using single crochet or a more elaborate lace design to create a soft neckline.
The Ocean Vista Dress is designed to be a comfortable, stylish, and customizable crochet project. With its flowing, lightweight design, it’s perfect for a day by the sea or a casual summer outing. You can adjust the length, fit, and detailing to make it uniquely yours!
Let me know if you’d like any additional help with modifications or clarifications!
