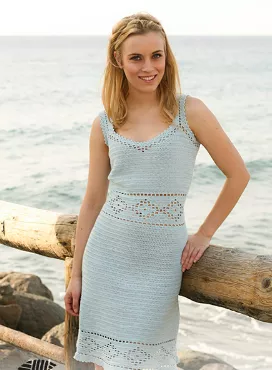
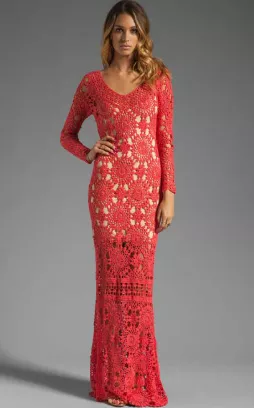
A Beach Cover-Up Dress is a perfect crochet project for summer! It’s a breezy, lightweight garment designed to wear over swimsuits for added coverage and style. Crochet beach cover-ups often use airy, open stitches to keep things comfortable and breathable. Below is a simple and versatile Crochet Beach Cover-Up Dress Pattern that you can customize in terms of color and size.
Materials:
- Yarn: Choose a lightweight yarn like cotton, linen, or bamboo for a breathable, beach-friendly feel. A sport weight (2-ply) or light worsted (3-ply) yarn works well.
- You’ll need approximately 400-600 yards depending on your desired dress length and size.
- Crochet Hook: Size H (5mm) or I (5.5mm) crochet hook.
- Tapestry Needle: For weaving in ends and joining motifs.
- Measuring Tape: To ensure proper fit.
Abbreviations:
- ch = chain
- dc = double crochet
- sc = single crochet
- sl st = slip stitch
- sk = skip
- sp = space
- st(s) = stitch(es)
- rep = repeat
Basic Stitches:
- Chain (ch): Used to begin a row or round.
- Double Crochet (dc): Yarn over, insert hook into stitch, yarn over again, pull through (three loops on hook), yarn over, pull through the first two loops, yarn over, pull through the last two loops.
- Single Crochet (sc): Insert hook into stitch, yarn over, pull through (two loops on hook), yarn over, pull through both loops.
- Shell Stitch: Typically 5 dc stitches worked into the same stitch or space.
Crochet Beach Cover-Up Dress Pattern
1. Creating the Foundation Chain:
Start by making a foundation chain that fits around your bust. The chain length should be a multiple of 4 (plus 2 for the turning chain). For example:
- Small: 120 chains
- Medium: 140 chains
- Large: 160 chains
Adjust the foundation chain for your bust size or desired fit. If you’re unsure, measure your bust and then add a bit of ease for comfort.
2. Working the Bodice:
After your foundation chain is done, work in rows for the bodice.
Row 1: Ch 3 (counts as the first dc). Work 1 dc into each chain across. Turn.
Row 2: Ch 3 (counts as dc), skip the first stitch, work 1 dc in the next stitch, 1 dc in the next stitch, then 1 shell (5 dc) in the next stitch. Repeat this sequence across the row. You’ll end with a shell stitch at the end of the row.
Row 3: Ch 3 (counts as dc), skip the first dc, work 1 dc in the next 2 dc, then 1 shell in the next chain space. Repeat across, ending with a dc.
Row 4: Ch 3 (counts as dc), then 1 dc into each dc and chain space across.
Repeat Rows 3 and 4 until your bodice measures about 6-8 inches (adjust to your preference for a shorter or longer bodice). This should give you an open, lacy effect but a structured fit.
3. Shaping the Skirt:
Once the bodice is finished, the skirt will be made in the round for a relaxed, flowing look.
Round 1 (Joining in the Round): Ch 3 (counts as the first dc). Join the ends of your bodice in the round using a sl st.
- Work 1 dc in each stitch around. Be sure to check that the fit is comfortable at this point before joining.
- Join with a sl st to the top of the first dc.
Round 2: Ch 3 (counts as dc), skip 2 dc, shell stitch (5 dc) in the next stitch. Repeat around. Join with sl st to the top of the first dc.
Round 3: Ch 3 (counts as dc), work 1 dc in each of the next 2 dc, then shell stitch (5 dc) in the next space. Repeat around, join with sl st.
Round 4: Ch 3, then work 1 dc in each dc and space across. Join with sl st.
Continue working in the round with alternating shell stitches and dc stitches until the skirt reaches your desired length. You can add more or fewer rounds depending on how long or short you want the cover-up to be.
4. Creating the Straps:
The straps can be made with a simple chain or a more intricate design based on your preference.
- Basic Strap:
- Ch 50-60 (depending on your preferred strap length).
- Sc in each chain across, then sl st to attach to the top corners of the bodice.
- Alternatively, you can use the shell stitch for straps, or even crochet a lacy edging around the straps for a more decorative look.
5. Finishing Touches:
- Edging: If you’d like a more polished finish, add a decorative edge around the bottom hem of the skirt. A simple scalloped edging is lovely and easy to do:
- Work 3 dc in the same stitch, skip 2 stitches, sl st in the next stitch, ch 3, skip 2, sl st in the next stitch.
- Weaving in Ends: Use a tapestry needle to weave in any loose ends and join any sections neatly.
Customization Options:
- Length: Adjust the number of rounds in the skirt to make the cover-up a mini, midi, or maxi dress.
- Color: Choose a summery color or multiple colors to make it more fun and vibrant.
- Fit: You can make the skirt more fitted by decreasing stitches or making the top more adjustable by adding lace ties or a stretchy stitch pattern.
Additional Tips:
- Fit Check: Make sure to try on the bodice as you go to ensure it fits snugly but comfortably.
- Yarn Choice: Cotton and bamboo yarns are great for this project as they are breathable and perfect for summer wear.
- Style Variations: You can adjust the neckline to be more square, V-shaped, or even halter style depending on your preference.
This crochet beach cover-up dress is a flexible design that you can easily modify to suit your personal style and size. Whether you prefer a simple, classic cover-up or a more ornate, detailed design, this pattern gives you a solid foundation to build on. Enjoy crocheting your new summer essential!
Let me know if you need any additional help or modifications to the pattern!
FREE PATTERN HERE


