Easy Crochet Baby Blanket Pattern: Soft and Simple for Beginners
Crocheting a baby blanket is one of the most rewarding projects for a beginner. With the right stitches and a simple design, you can create a beautiful, cozy blanket in no time. This easy crochet baby blanket pattern uses just a few basic stitches, making it perfect for those new to crochet or anyone who wants a relaxing project.
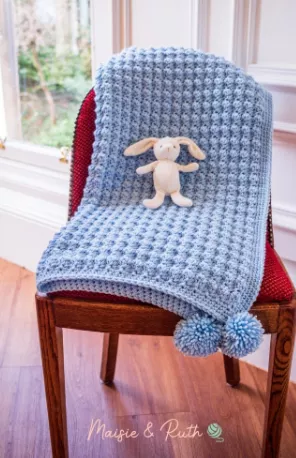
This pattern uses a combination of single crochet (sc) and half double crochet (hdc) stitches to create a soft, textured fabric. The pattern is simple enough to follow while allowing you to create a beautiful and functional piece for a baby.
Materials Needed:
- Yarn: Choose a soft, baby-friendly yarn. Acrylic or cotton-blend yarns are great for baby blankets because they are gentle on the skin and easy to care for. A medium-weight yarn (Worsted weight, Category 4) is perfect for a warm, cozy blanket.
- For a standard-sized baby blanket (around 30″ x 36″), you will need approximately 800-900 yards of yarn.
- Crochet Hook: Use a 5mm (H-8) hook, which is ideal for worsted-weight yarn. Be sure to check the yarn label for the recommended hook size.
- Tapestry Needle: For weaving in ends after you finish the blanket.
- Scissors: To trim the yarn when you are done.
Gauge:
- Gauge: 4″ x 4″ square = 14 stitches and 14 rows in single crochet.
- This pattern is flexible, but if you want to match the gauge, adjust your tension or hook size as needed.
Size:
This pattern creates a 30″ x 36″ baby blanket, which is a common size for a baby. You can adjust the size by changing the number of foundation chains and the number of rows.
Step-by-Step Instructions:
Step 1: Make the Foundation Chain
To start the blanket, chain the number of stitches that will give you the desired width. For a 30″ wide blanket using worsted weight yarn, chain 90 stitches.
- Tip: If you want a larger blanket, increase the number of chains in multiples of 2. For example, chain 100 for a slightly wider blanket or adjust according to your desired width.
Step 2: Row 1 – Single Crochet
- Turn your work.
- Work 1 single crochet (sc) in the second chain from the hook and continue across the row.
- When you reach the end of the row, turn your work.
Step 3: Row 2 – Half Double Crochet
- Chain 2 (this does not count as a stitch) at the beginning of the row.
- Work 1 half double crochet (hdc) in each stitch across the row.
- When you reach the end of the row, turn your work.
Step 4: Row 3 – Single Crochet
- Chain 1 (this does not count as a stitch) at the beginning of the row.
- Work 1 single crochet (sc) in each stitch across the row.
- When you reach the end of the row, turn your work.
Step 5: Repeat Rows 2 and 3
Continue alternating between Row 2 (half double crochet) and Row 3 (single crochet) until the blanket reaches the desired length. The texture created by switching between the two stitches will give the blanket a soft, gentle wave.
- For example, repeat Row 2 (hdc) and Row 3 (sc) until you’ve completed about 36″ of length (or whatever length you want for your blanket).
- Keep in mind that you can make the blanket longer or shorter depending on your preference.
Step 6: Finishing
When you reach the desired length, fasten off your yarn. Leave a small tail for weaving in the end. Use a tapestry needle to weave in any loose yarn ends so the blanket looks neat and professional.
Optional: Add a Simple Border
If you want to give your blanket a finished, polished look, you can add a simple border.
- Round 1 – Single Crochet Border:
- Attach the yarn to any corner of the blanket.
- Chain 1 and work 1 single crochet (sc) in each stitch around the entire blanket. When you reach each corner, work 3 single crochets to keep the corners smooth.
- Join with a slip stitch at the beginning of the round.
- Round 2 – Half Double Crochet Border:
- For an added texture, you can follow with a round of half double crochet (hdc) around the entire blanket. Work 1 hdc in each stitch, and make 3 hdc in each corner stitch.
- Finish with a slip stitch to join the round and fasten off the yarn.
Customizing Your Baby Blanket
- Change Colors: To add a personal touch, change yarn colors every few rows to create stripes or a multicolor pattern.
- You can switch colors after each row or every few rows, depending on the look you prefer.
- Add a Lacy Border: If you’d like a more decorative edge, you can use a shell stitch border or a picot stitch for a lacy look.
- Larger Blanket: If you’d like a larger blanket, simply add more foundation chains (in multiples of 2) to increase the width, and add more rows to increase the length.
Conclusion
This easy crochet baby blanket pattern is perfect for beginners. It uses just two basic stitches, single crochet and half double crochet, making it easy to follow while still creating a beautiful and cozy blanket. You can easily customize the pattern with colors or borders, and it’s an excellent project for any occasion.
Whether you’re making it for your own little one or as a gift, this soft and simple baby blanket will surely be loved and appreciated. Enjoy the process and happy crocheting!
FREE PATTERN


